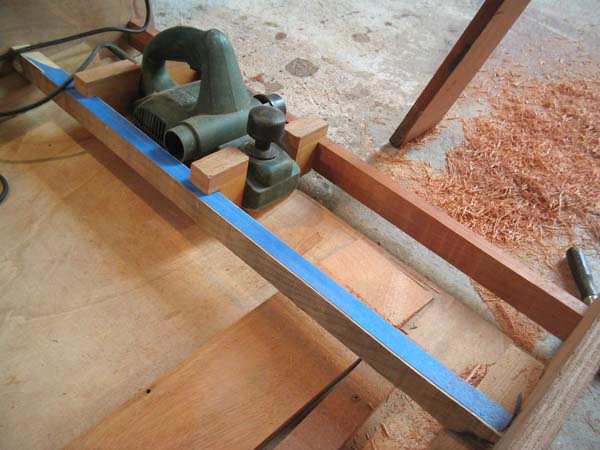
The jig consists of a piece of ply to which two sides are attached. Between
the two sides two battens are fitted, one higher than the other. This
determines the angle of the cut. The plank to be scarfed is positioned
against a plank screwed to the ply and an end stop. Then the plane is run
repeatedly over the plank end until no more wood is being removed. That's
it. A perfect scarf. By planing a bit deeper, a step can be incorporated in
the scarf. This helps to lock the scarfs together.
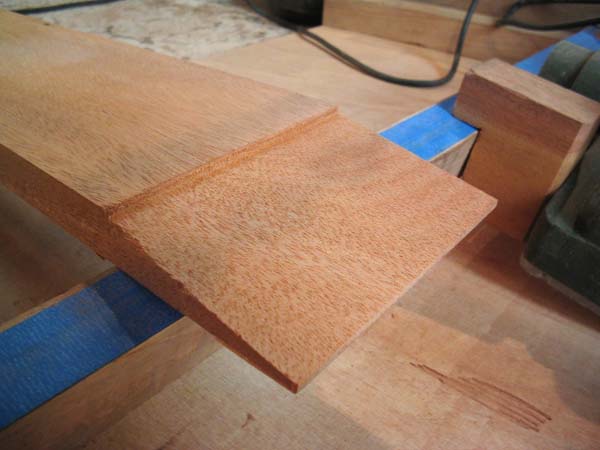
This shot shows the end result. Note the blue masking tape added to the
batten, this was added to 'fine tune' the accuracy of the cut
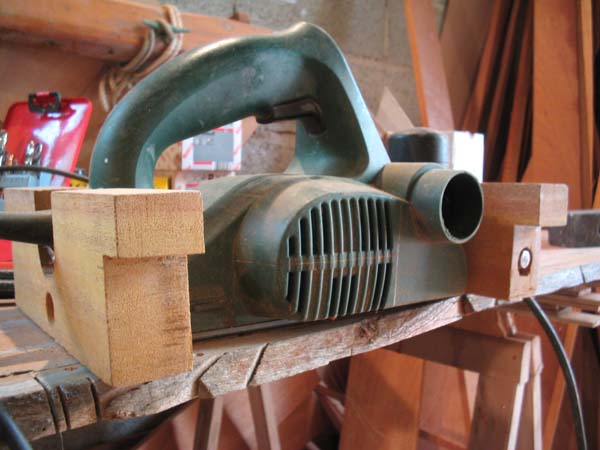
This picture shows how wooden guides were bolted to the electric plane using
the holes normally used for attaching the accessories. Most planes have any
number of holes you could use. The guide at the back was also glued in place
to stop it moving using a hot glue gun.
Sometimes, if you have a lot of planks to join it's worth taking the time to
make a jig. Jigs allow a very consistent result, cut a scarf very quickly
and save a lot of time at the end of the day. Here a cheap Bosch electric
planer is modified to run along a pair of guides.